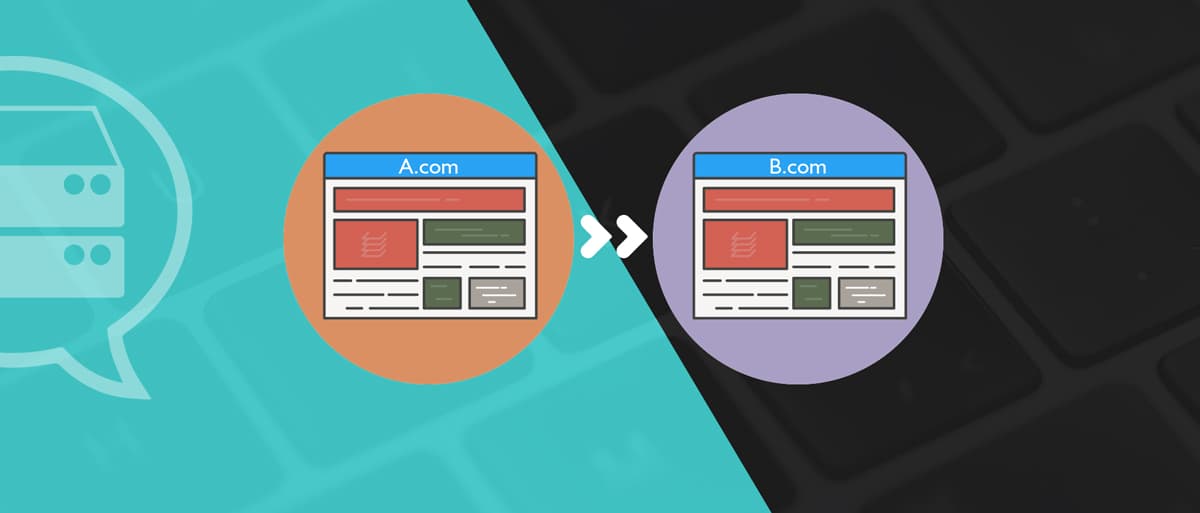


Migrating a WordPress site is no easy task. It can either be done manually, which requires some advanced skills or with a migration plugin.
If you are reading this article, there is a good chance that you encountered the All-in-One WP migration import stuck error during the export or import process.
This process has to be done meticulously to make sure everything goes right. It’s a vital step for your site if you intend to move it elsewhere. So it makes sense that the migration has to be perfect to avoid any data corruption or data loss.
Unfortunately, on some occasions, the migration process can get stuck during the export, or you will be unable to import. Mostly because of one of the following reasons:
- The free version doesn’t allow importing big backup files
- Timeout issues
- Server space saturated
But rest assured, in this guide, I’ll show you exactly how you can fix all in one wp migration import problem. So let’s get started!
Contents
Solution #1: Download the Plugin with 2000GB limit
To save you time, here is an old version of the plugin that I increased its upload limit myself. This will allow you to upload files up to 2 TB.
Yes, you heard me right, that’s over 1000 GB 🙂
Once you are done with the plugin, remember to update it to a newer version or delete it.
Solution #2: Install and Edit old version of plugin – 6.7
If you want to edit the plugin yourself, then this solution is for you.
So, the second solution to try would be to use the restore feature of the plugin to import your backup. But this feature isn’t available in the free version of All in One wp migration plugin.
This is why we are going to use an “old version of the plugin” that will allow you to use the restoration feature. Here are the simple steps to install it:
- First, Delete your current version of All-in-one migration plugin
- Second, Download the older version of “All-in-on WP Migration Plugin 6.7”
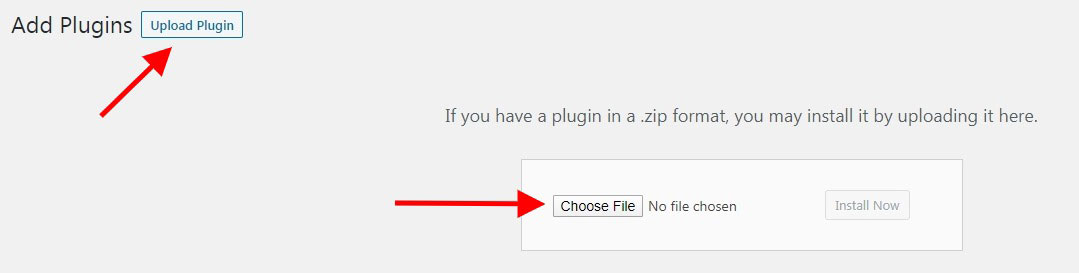
- Third, Upload your zip file through your WordPress Dashboard > Plugins > Add New > Upload Plugin
Basically, the following process consists of 3 major steps:
1. Export your WordPress website backup .wpress file
Start by exporting your backup file. When the export finishes, you’ll get a**.wpress file**.
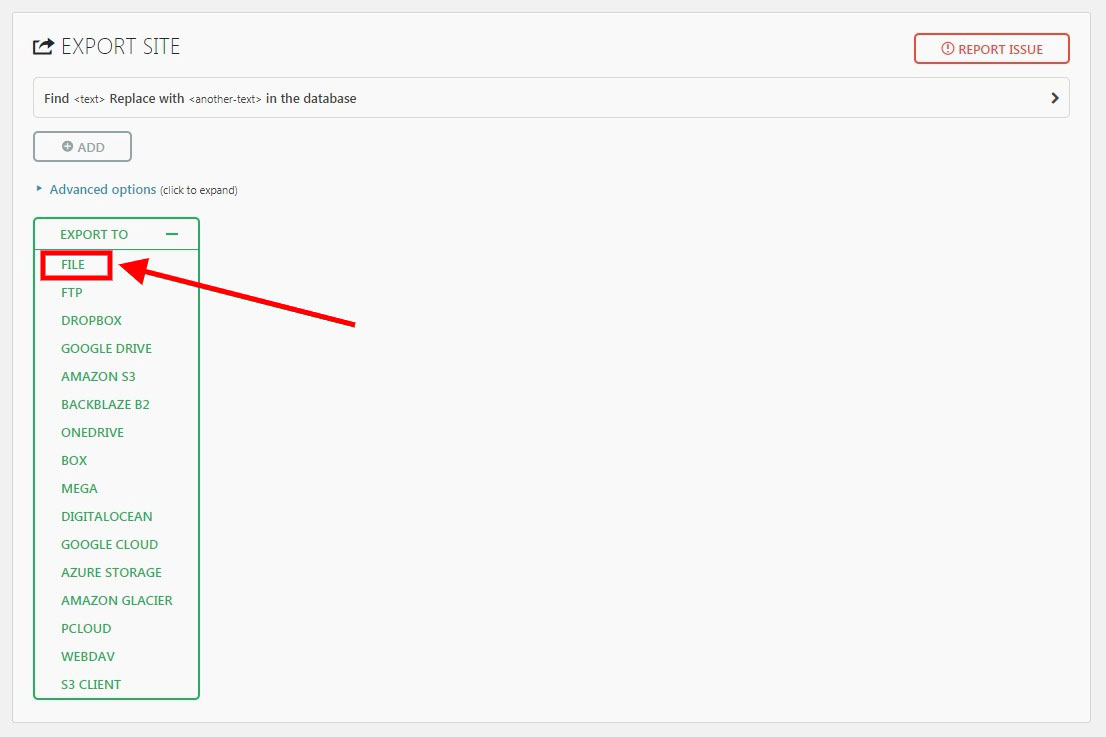
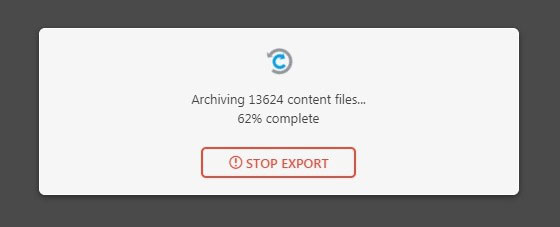
Keep in mind that this step may take a long time, depending on how big the size of your site is.
**
**
2. After you download the backup file, upload the .wpress file to your new server through FTP
After you download your .wpress file, it is time to upload it to the new server.
You can either upload it by FTP through Filezilla or better I recommend directly from within your hosting file manager, this method allows for a way faster upload.
Connect to your hosting panel, and click on File Manager.
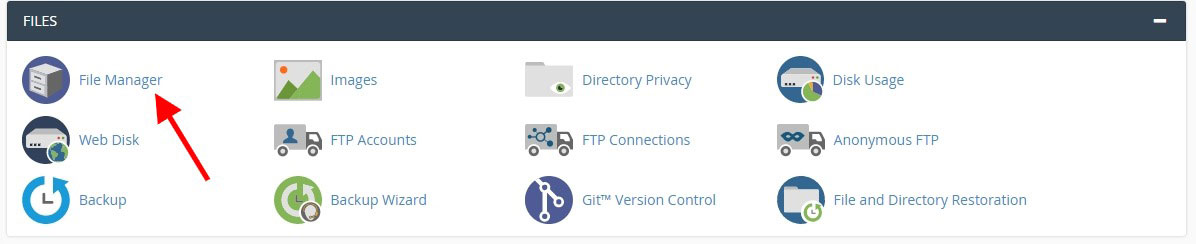
Assuming you have already installed All in One wp migration plugin at your new server, then navigate to wp-content/ai1wm-backups/ directory and upload your file there**.**
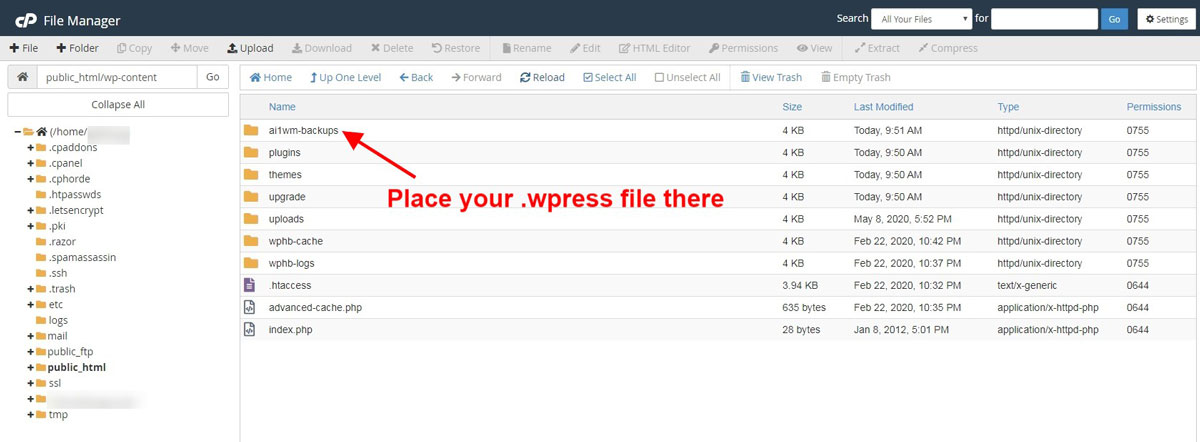
3. Use the restore feature to install the .wpress file on your site
Once the .wpress file is successfully uploaded inside the ai1wm-backups directory, you’ll need to download the older version of the plugin so you can use the restore feature.
So if you already have installed the newest version of the plugin, delete it and upload the old plugin version provided above.
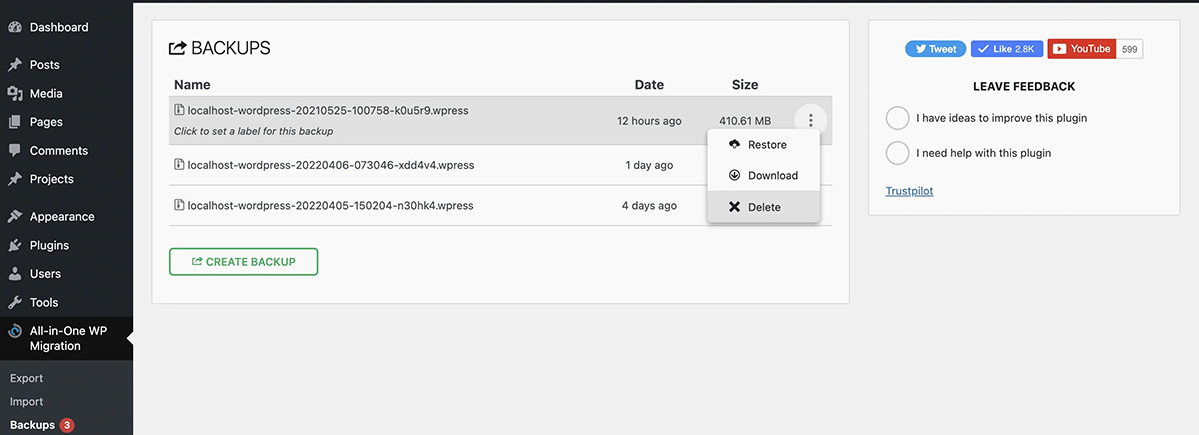
If you go to Backups settings, you’ll be able to find a new backup file you uploaded earlier, all that is left for you to do is to click the Restore button.
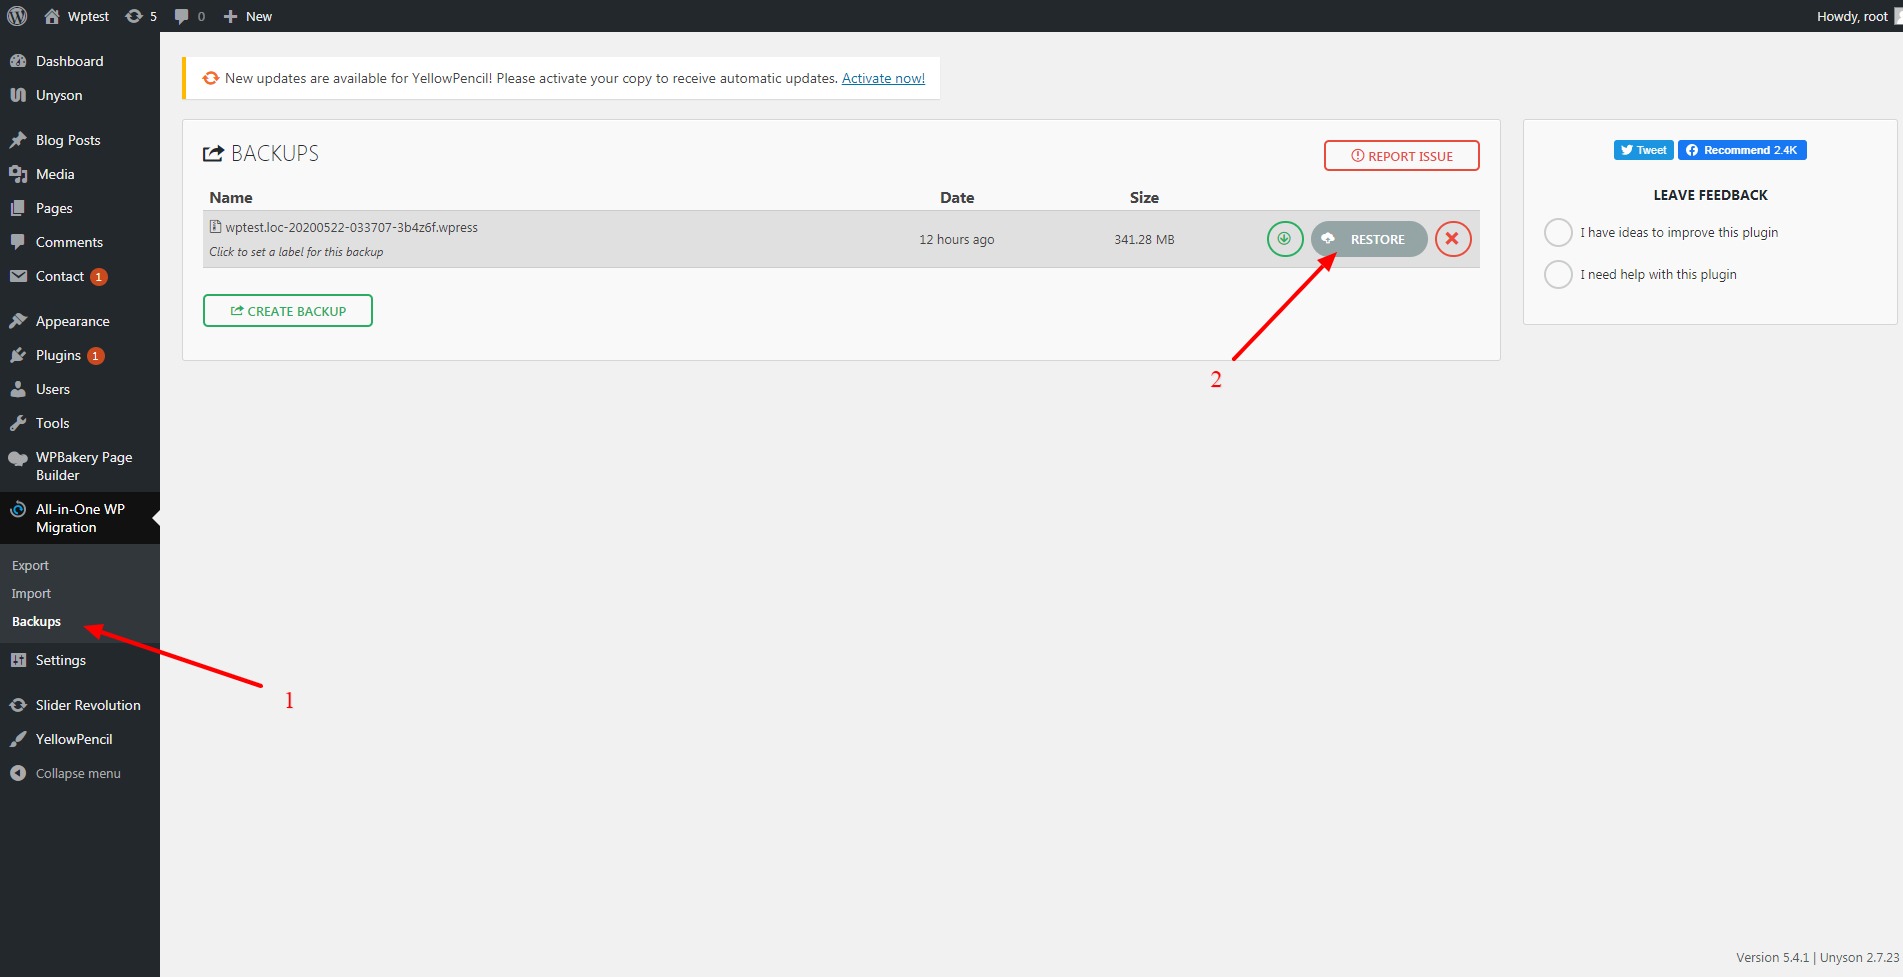
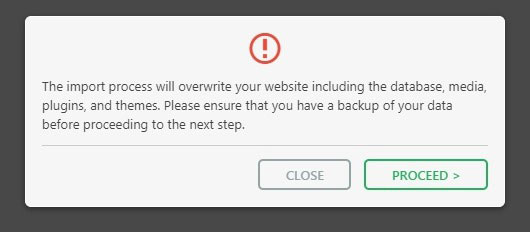
After you initiate the restoration process, you’ll get a popup notifying you that your current site data will be overwritten with the new restoration. Click on Proceed.
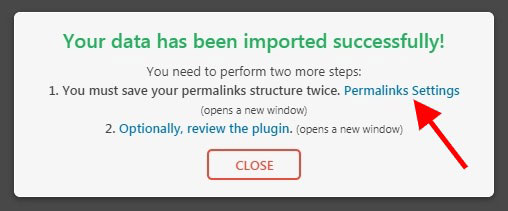
Now that your backup restoration has finished. You have one more thing left to do, which is to update your permalink settings. Basically you just need to save them again, and your migration process will be completed.
4. Your backup file size is too big?
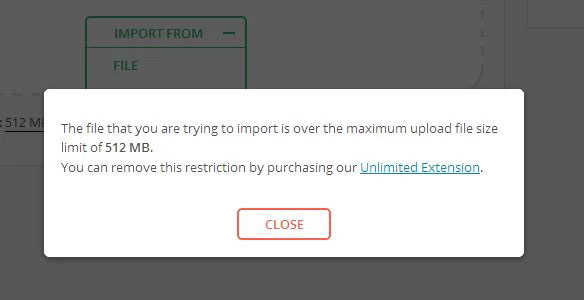
Sometimes, if the file that you’re trying to import exceeds the maximum upload file size of the free version of the plugin, here is what you can do to bypass this limit:
STEP 1: Open the Plugin Editor
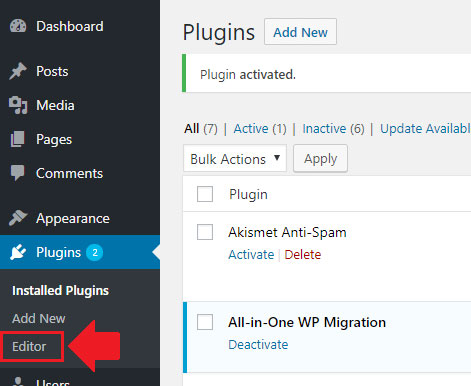
From your left menu, go to Plugins and click on Editor.
STEP 2: Select Your Plugin
Among the list of plugins, select All-in-one WP migration
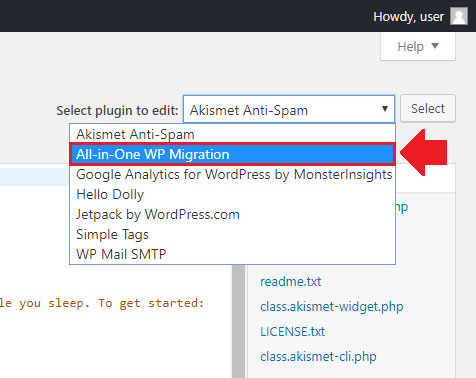
STEP 3: Open constants.php file
Once you have selected your plugin, you should be able to see on your right a PHP file called “constants.php”, click on it, because that’s where we will increase the upload limit.
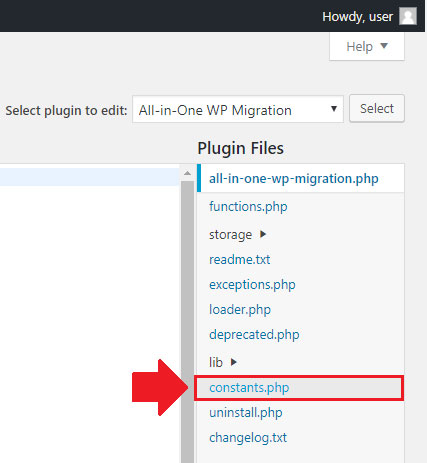
STEP 4: Edit the constants.php file
Scroll down to find a line with a comment of “ Max File Size “, it should be on line 284. If you can’t find it there, then just search for the comment “Max File Size” with “Ctrl + F” and you should be able to find it.
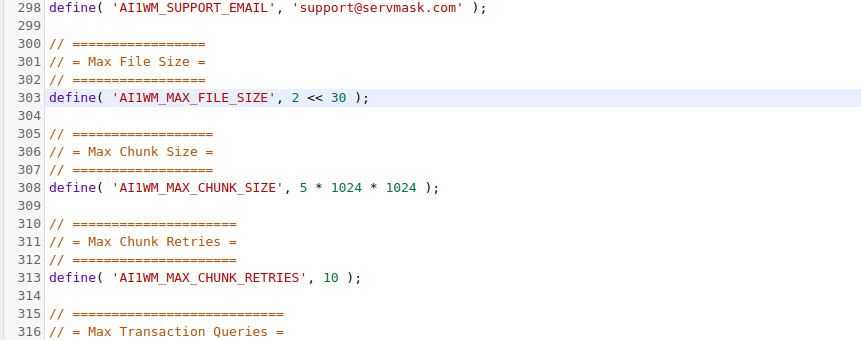
Once there, replace 28 with a higher number like 32 (increasing the number by one will double the size)
Click on Update File. And Voila!!
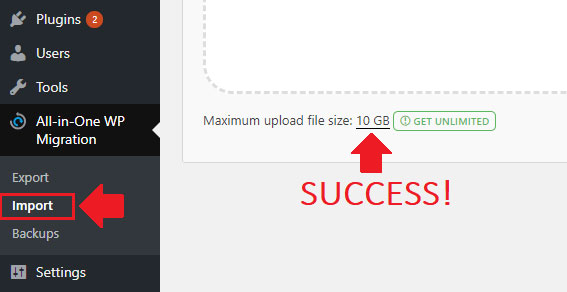
Solution #3: Disk quota exceeded in cPanel
One of the reasons why you might not be able to generate a new backup of your site is that your disk space is full. Therefore, you need to clear some space for it in order to create your backup file.
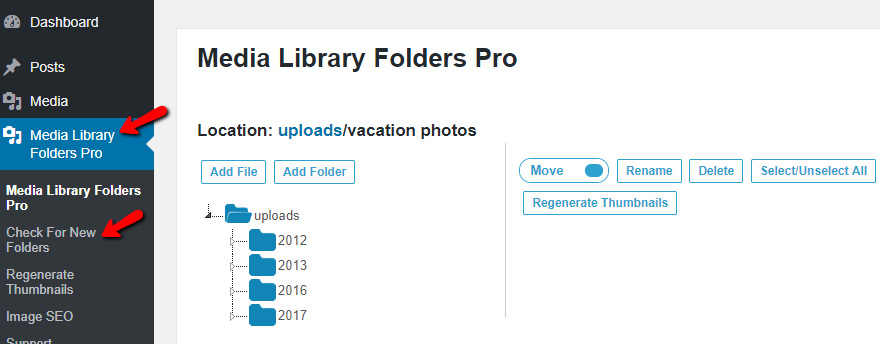
This problem can easily happen if you are adding content to your site on a regular basis. The two main causes to watch out for are the uploads (media) directory which contains files such as (images, audio, documents, videos, etc.) and the backup directory which contains all your website backups.
I have created a dedicated guide for this matter on how you can free more disk space on your hosting account.
Solution #4: Hosting Limitations
This happens because of the time limitation set by default in your hosting account settings.
Timeout issues
Basically, this means that your hosting has a maximum time limit for how long a request should last. Let’s say “exporting a backup” takes an hour to be completed and your server’s maximum execution time is only 20 minutes, then this will likely cause a timeout error.
The bigger the size of your website, the more time it will need to generate the .wpress file.
Sometimes the time to generate the file can take long. That’s why it is best to increase the time limitation on your server. There are two ways you can increase this limitation:
- Editing .htaccess file
- Editing wp-config.php
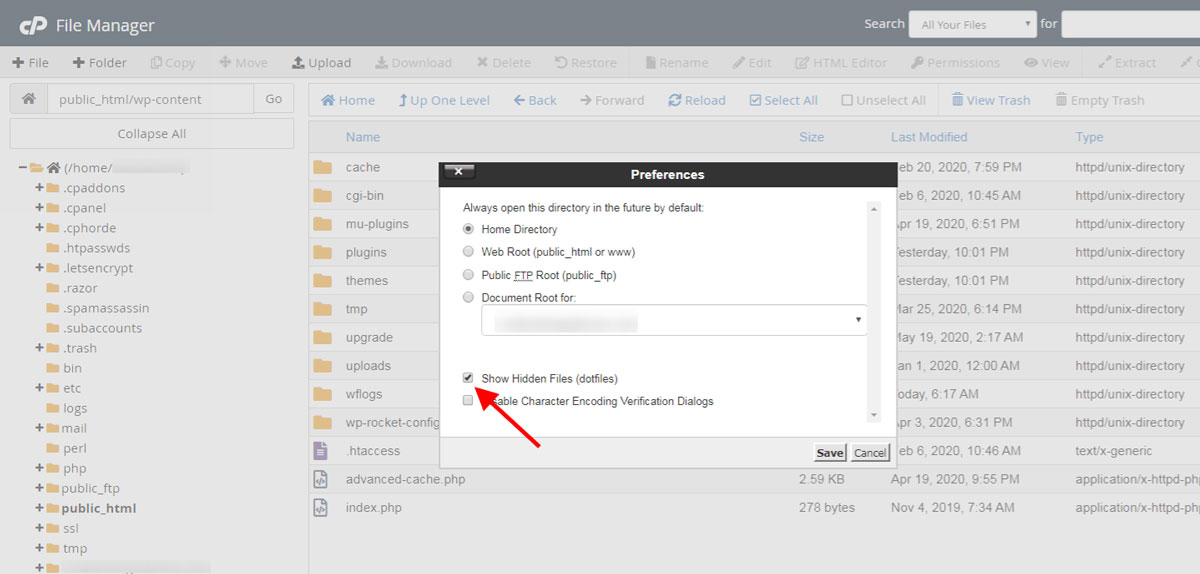
To edit the mentioned files, you can do it from your hosting file manager. Sometimes the htaccess file is hidden by default, so you need to select this option to make it visible.
.htaccess
Change the numbers to the values you need. Keep in mind that the first three lines are related to memory values in Megabytes. As for the last two lines, they represent values in seconds. So increase them if you feel that it’s necessary to do.
wp-config.php
Server Firewall
Sometimes the reason can be the blockage of your hosting’s firewall, like ModSecurity which prevents the migration from going through.
So in this case, what you want to do is reach out to your web hosting support and ask them to add a rule to whitelist your hosting account in their firewall.
Solution #5: Use Free Migration Service
In some cases, some of these problems are caused because some web hosting companies set limitations on their servers.
Unfortunately, some of these limitations cannot be changed simply because the hosting company wishes to save on its server’s resources. That’s why it’s essential that you choose a web hosting that doesn’t impose these kinds of limitations on its users.
For this purpose, I highly recommend Cloudways for the following reasons:
- They offer a Free Migration Service, which means you don’t have to do a thing, they take care of everything for you.
- Cloudways has HTTP/3 Supported Servers, which means you can transfer files like**.wpress** at a high speed.
- On top of all, Cloudways offers Free Backups, Free SSL on their plans, so those are fewer expenses that you’ll have to worry about.
- They have Built-in Server Cache, so your site is guaranteed to run faster than most other web hosts.
- Cloudways offers High-Quality Support along with the most reliable security in the web hosting industry.
Conclusion
I have used Duplicator plugin in the past and I think that it’s a good alternative in case you are considering a new backup and migration plugin.
With that said, I hope this article helped you solve your problem!
If you are still facing any issues with your migration, do let me know in the comment section and I will help you in the best way I can 🙂